
The Ultimate Guppy Fry Care Guide: From Birth to Coloration
July 5, 2024 Cichlids Fish
🐠 The Ultimate Guppy Fry Care Guide: From Birth to Coloration
Raising guppy fry is one of the most rewarding experiences for any aquarist. Watching tiny, translucent babies transform into colorful adults full of personality feels almost magical. But getting them safely from birth to full coloration requires understanding, patience, and proper care.
This guide breaks down every stage of guppy fry development — from delivery and early feeding to growth management and color enhancement — so you can raise strong, vibrant guppies with confidence.
👶 Stage 1: The Birth — Preparing for New Fry
Female guppies give birth to live young, not eggs, making them livebearers. Each drop can produce 20–100 fry, depending on the female’s age and health.
🕘 How to Know Birth Is Coming
Watch for these signs:
-
Female’s belly becomes boxy and swollen.
-
Gravid spot (dark patch near the anal fin) becomes darker.
-
She isolates herself and hides more.
-
Loss of appetite or erratic swimming.
🧺 Birthing Setup Options
1️⃣ Dedicated Fry Tank
The safest and most controlled method. Use a 5–10 gallon tank with:
-
Gentle sponge filter
-
Heater set to 78–80°F (25–27°C)
-
Floating plants (Hornwort, Frogbit, or Water Sprite) for shelter
-
Bare bottom for easy cleaning
2️⃣ Breeder Box
If you can’t separate the female fully, a breeder box inside the main tank works — but remove her immediately after birth to prevent her from eating the fry.
3️⃣ Dense Plant Method
In community tanks, use thick floating plants or moss (Java moss, Guppy grass). It’s less reliable but can still yield survivors.
🍼 Stage 2: The First 24 Hours — Critical Survival Period
Right after birth, fry are tiny (around 6 mm) and instinctively seek shelter.
✅ Do’s
-
Keep lighting low for the first 24 hours.
-
Ensure calm, oxygenated water (use air-driven sponge filters).
-
Avoid feeding immediately — fry still absorb yolk nutrients.
❌ Don’ts
-
Don’t leave adult guppies in the tank.
-
Don’t make sudden water changes.
-
Don’t overfeed early — it fouls the water.
🍽️ Stage 3: Feeding Guppy Fry (Days 2–30)
Fry begin to eat within 24–48 hours. Nutrition is the foundation of growth and coloration.
🦠 Best First Foods (Days 2–10)
-
Infusoria: Natural microscopic organisms; essential in the first week.
-
Liquid fry food: Commercially available and easy to use.
-
Vinegar eels or microworms: Perfect live starter foods for stronger growth.
💡 Pro Tip: Keep a culture of microworms or infusoria ready before birth. Fry need food immediately once they start swimming.
🐛 Next-Level Foods (Days 10–30)
-
Baby brine shrimp (BBS): The gold standard for growth and color.
-
Crushed flakes or powdered fry food: Supplement between live feedings.
-
Frozen cyclops or daphnia: Great variety once fry are 2–3 weeks old.
🍴 Feeding Frequency
-
4–5 small meals per day for the first 2 weeks.
-
Reduce to 2–3 meals daily after 1 month.
🧼 Important: Clean uneaten food after each feeding. Fry tanks foul quickly due to overfeeding.
💧 Stage 4: Water Quality — The Lifeline of Fry Growth
Young fry are highly sensitive to toxins. Stable, clean water ensures fast growth and minimal deformities.
🔧 Ideal Parameters
| Parameter | Range |
|---|---|
| Temperature | 78–80°F (25–27°C) |
| pH | 6.8–7.5 |
| Hardness | 8–12 dGH |
| Ammonia/Nitrite | 0 ppm |
| Nitrate | <20 ppm |
🔄 Maintenance Routine
-
25–30% water change every 2–3 days.
-
Use a siphon with airline tubing to avoid sucking up fry.
-
Match temperature and pH when adding new water.
🌬️ Filtration
Use sponge filters only — safe for fry and provide excellent biological filtration. Avoid strong power filters until fry are at least 1 month old.
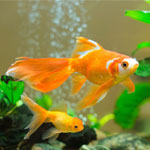
🏡 Stage 5: Growth Management and Space Planning
By week two, guppy fry grow rapidly. Overcrowding can stunt their development and increase disease risk.
📏 Tank Upgrading
-
Start with 10 gallons for 30–40 fry.
-
Move to a 20-gallon grow-out tank by week 4–5.
🧑🤝🧑 Sorting by Size and Gender
-
Separate larger fry to prevent bullying.
-
Males begin showing gonopodia (modified anal fins) around 3–4 weeks.
-
Remove early-maturing males to prevent uncontrolled breeding.
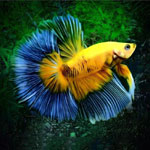
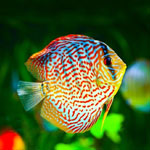
🌈 Stage 6: The Coloration Phase (Weeks 4–12)
At this stage, genetics and nutrition combine to reveal each guppy’s unique colors and patterns.
🎨 When Color Appears
-
Most strains start showing faint colors by 4 weeks.
-
Full coloration usually appears between 8–12 weeks.
🍤 Foods That Enhance Color
-
Baby Brine Shrimp (daily) – Natural carotenoid source.
-
Spirulina Powder or Algae Wafers – Boosts greens and blues.
-
Krill, Daphnia, or Bloodworms – Rich in astaxanthin for reds and oranges.
-
High-quality flake/pellet food – Ensure it lists fish meal and spirulina as main ingredients.
💡 Tip: Avoid over-relying on one food type — variety ensures balanced growth and vibrant hues.
💪 Stage 7: Building Immunity and Preventing Disease
Fry are fragile but can develop strong immune systems with consistent care.
🧬 Preventive Measures
-
Quarantine new plants or equipment before use.
-
Keep temperature stable — fluctuations cause stress.
-
Add Indian Almond Leaves (IAL) or catappa extract for natural antifungal protection.
-
Supplement with vitamins (e.g., Seachem Nourish or VitaChem) weekly.
⚠️ Common Fry Issues
| Issue | Cause | Solution |
|---|---|---|
| Stunted Growth | Overcrowding, poor diet | More space + live food |
| Fungal Infections | Poor water quality | Partial water change + IAL |
| Belly Sliders | Temperature shock | Maintain stable 78–80°F |
| Fin Clamping | Stress or ammonia | Improve filtration + aeration |
🧑🎨 Stage 8: Selective Culling and Line Development
Breeding guppies often produces uneven results. Not all fry will display ideal colors or fin shapes.
✂️ Why Culling Matters
Selective culling ensures your strain remains healthy, beautiful, and true to type.
🧩 How to Cull Responsibly
-
Remove deformed or weak fry early (around 3–4 weeks).
-
Rehome or use as feeder fish if ethical and legal in your region.
-
Keep top 10–20% for future breeding projects.
💡 Pro Tip: Track parentage and outcomes to refine traits like tail pattern, color saturation, or growth speed.
💡 Stage 9: Transitioning to Juvenile Tanks
By 8–10 weeks, your guppy fry will resemble mini adults.
🐟 Transition Checklist
-
Strong swimming and active feeding.
-
Clear coloration visible.
-
No signs of deformities or stress.
Move them to:
-
Community grow-out tanks (15–30 gallons).
-
Add low-flow filtration (HOB or internal) with sponge pre-filter.
-
Introduce adult food gradually.
🌟 Stage 10: Achieving Maximum Color and Size
To bring out the full potential of your guppy fry:
-
Continue diverse feeding (BBS + quality flakes).
-
Provide natural light cycles (8–10 hours per day).
-
Maintain consistent water quality and frequent changes.
-
Avoid inbreeding — refresh lines with new genetics every few generations.
📏 Growth Benchmarks
| Age | Length | Visible Traits |
|---|---|---|
| 1 week | 6–7 mm | Clear body |
| 3 weeks | 1 cm | Early patterns visible |
| 6 weeks | 1.5–2 cm | Gender traits forming |
| 10–12 weeks | 2.5–3 cm | Full coloration, adult form |